
To use Kling AI in 2026, visit kling.ai, sign in, and choose between Text-to-Video and Image-to-Video. Kling’s VIDEO 3.0 supports high-quality, 3–15-second videos at 720p or 1080p, with synchronized audio when enabled. Start/end frames guide the visuals, while Multi-Shot in Kling’s studio can add automatic camera cuts.
While Kling 3.0 is incredibly powerful, testing high-end features like native audio and character consistency directly on the official site can quickly drain your credits. GlobalGPT solves this problem by offering an “all-in-one creative sandbox” with Pro at $15 monthly or $10.80 per month billed annually ($129.60 for a year). Instead of paying for multiple isolated subscriptions, you can use GPT-6 Astra to write your scripts, Midjourney to generate base images, and Kling 3.0 to animate them—all on one dashboard.
As of September 30, 2026: Kling’s official site promotes Kling 4.0, and its app advertises early access to Kling 4.0 Flash. GlobalGPT offers Kling 3.0. Choose the model and platform before following the settings below.
- Kling AI Tutorial for Beginners in 2026: How to Start Your First Video?
- How Does Kling 3.0 Change Video Quality?
- What Are the Step-by-Step Methods for Text-to-Video and Image-to-Video?
- How Do You Master Advanced Features Like Multi-Shot and Character Consistency?
- How Can You Create Professional Videos Without Wasting Expensive Credits?
- What Are the Best Settings for TikTok, YouTube, and Professional Ad Formats?
- FAQs
- Conclusion
Kling AI Tutorial for Beginners in 2026: How to Start Your First Video?
To start your first Kling project, choose where you want to work: Kling’s own studio or the Kling 3.0 workspace inside GlobalGPT. The two services use separate accounts and credit balances.
- Sign In: On Kling’s website, choose a sign-in method offered on the page. If you prefer GlobalGPT, sign in to your GlobalGPT account and open Kling 3.0 from the video tools.
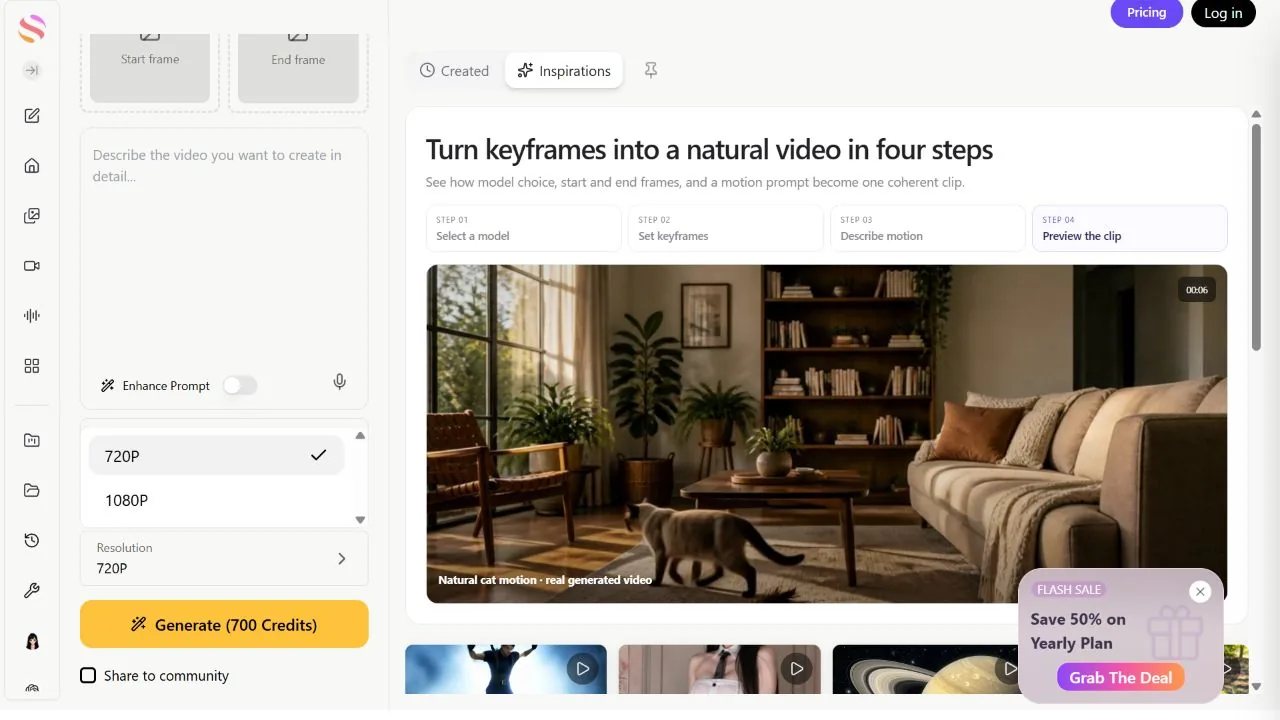
- Understanding the Dashboard: In GlobalGPT’s Kling 3.0 workspace, use the prompt box for text, or upload a Start frame and an optional End frame. Choose aspect ratio, duration, resolution, and whether to enable Native Audio.
- Choose the Right Model: VIDEO 3.0 and VIDEO 3.0 Omni are separate models. Select VIDEO 3.0 in Kling’s studio, or Kling 3.0 in GlobalGPT, before choosing your clip settings.
How Does Kling 3.0 Change Video Quality?
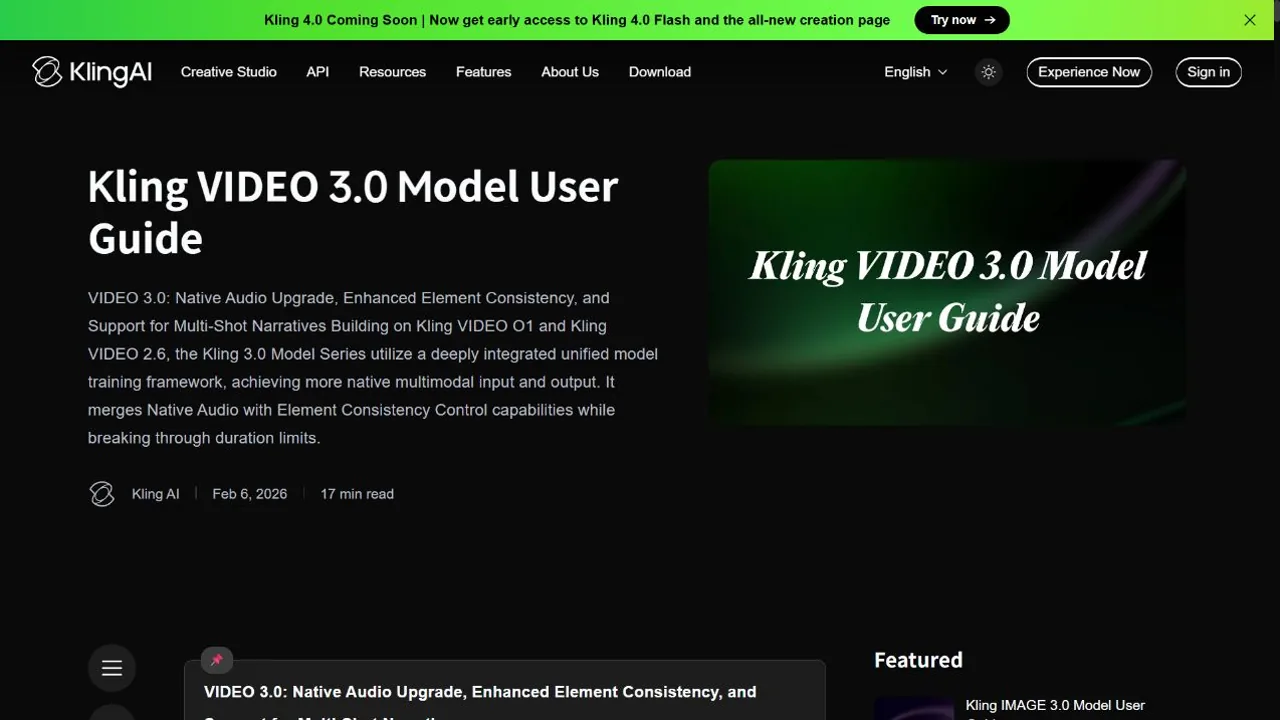
Kling VIDEO 3.0 generates video, sound, and camera movements in one workflow. Turn on native audio when you want dialogue or environmental sound.
For clip length and audio settings, use the official VIDEO 3.0 guide. Higher-resolution subscriber options appear in the Kling app and depend on the selected workflow.
- 15-Second Narratives: VIDEO 3.0 supports clips from 3 to 15 seconds, allowing for a full 15-second story. This is enough time for a character to walk into a room, sit down, and start a conversation.
- Resolution Depends on the Mode: The VIDEO 3.0 guide lists 720p and 1080p, and GlobalGPT’s Kling 3.0 panel offers those two options. Kling’s app also advertises subscriber access to 4K in other workflows. For the settings described here, use 720p or 1080p; 4K/60fps is not an available option in that GlobalGPT panel.
- Native Audio: When native audio is enabled, the AI creates matching audio (speech or environmental effects) alongside the visual action. Include the dialogue or sounds you want in the prompt.
For a five-second clip, the official VIDEO 3.0 rates work out to 30 Kling credits at 720p without audio or 60 at 1080p with native audio. Adding voice-tone control to the 1080p audio example costs another 10 credits, bringing the total to 70 Kling credits. These are Kling credits, not GlobalGPT credits.
What Are the Step-by-Step Methods for Text-to-Video and Image-to-Video?
Kling AI offers two main ways to create: writing a description from scratch or bringing a static photo to life.
Keep the first prompt simple: one subject, one action, and one camera move. This Kling 3.0 prompt guide shows how to add detail without crowding the shot.
- Text-to-Video (T2V): In the prompt box, describe the scene like a movie director. Instead of just saying “a cat,” say “A cinematic close-up of a cat jumping over a fence, slow motion, morning sunlight.” This gives the AI better instructions for movement.
- Image-to-Video (I2V): Upload a high-quality photo as your Start frame, then describe what should move and how the camera should behave. For example: “The river flows slowly to the right; the camera stays still.” For more examples, use this Kling image-to-video guide.
- Start and End Frames: For complicated transitions, upload two different images. The AI will calculate the “middle” parts to create a smooth transformation or time-lapse video.
How Do You Master Advanced Features Like Multi-Shot and Character Consistency?
Advanced features in Kling 3.0 allow you to create complex films that look like they were made by a professional editing team.
- Multi-Shot Storyboarding: In Kling’s own studio, turn on “Multi-Shot” to generate different camera angles for the same scene. It can automatically cut from a “Wide Shot” to an “Extreme Close-up” within the same 15-second clip. Open Custom Multi-Shot if you want to write the shots yourself.
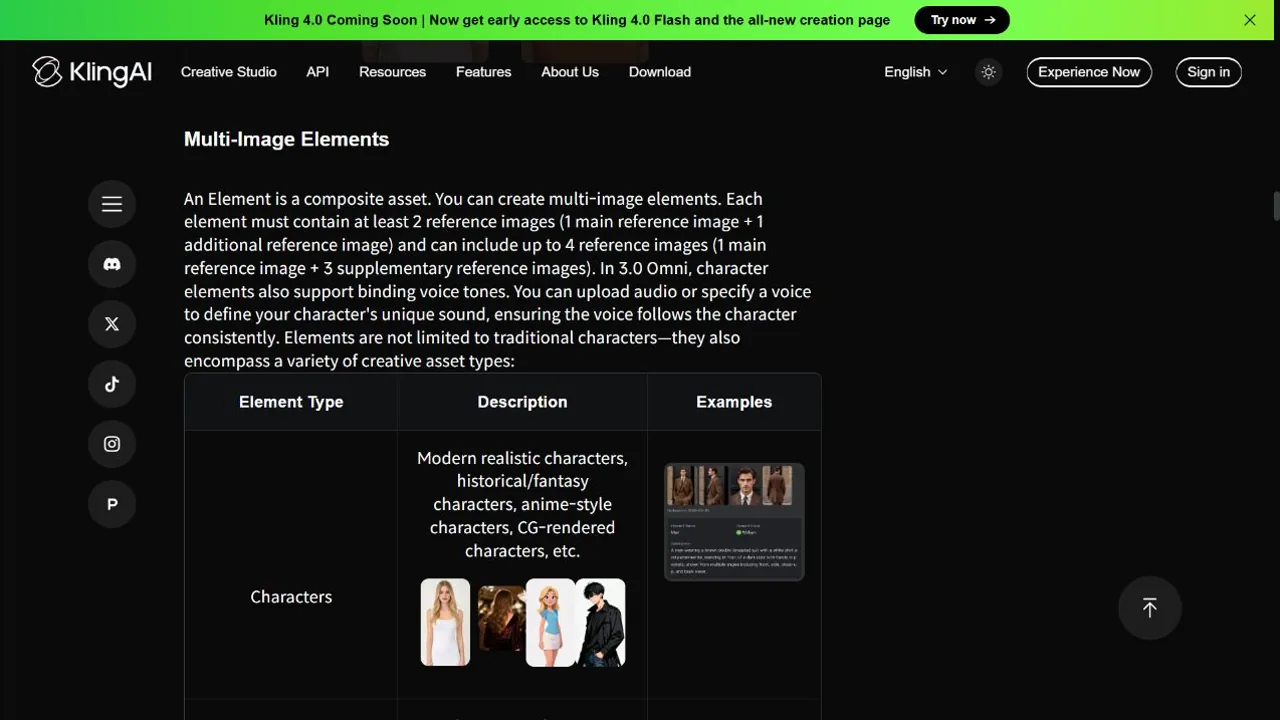
- Subject Binding (Character Consistency): After uploading a start frame in Kling’s studio, choose “Bind Subject to Enhance Consistency” and create an element from 2–4 reference images. Reuse it so the hero in Scene A keeps the same face and clothes in Scene B. Follow the character consistency guide for the reference setup.
- Native Lip-Sync: If you want your character to speak, enable native audio and type the dialogue in the prompt box. The AI generates the character’s voice and mouth movement together.
The Element Library guide explains which reference images you need for subject binding in Kling’s studio. In GlobalGPT, upload your reference through Start frame and use End frame when you need a specific finishing image.
How Can You Create Professional Videos Without Wasting Expensive Credits?
The “Zero-Waste” workflow involves using cheaper AI tools for planning so that you only spend your high-value Kling credits when you are 100% ready.
- Pre-Production with GPT and Midjourney: Before you open Kling, use GPT-6 Astra to refine your prompt and Midjourney to create a perfect base image. It is much cheaper to fix a “bad image” in Midjourney than to fix a “bad video” in Kling.
- The GlobalGPT Sandbox: Because GlobalGPT integrates MJ, GPT, and Kling on one platform, you can jump between tools instantly. If you need more NSFW-flexible models, compare their content restrictions first. Creating a reference with another image model does not change what Kling accepts as input.
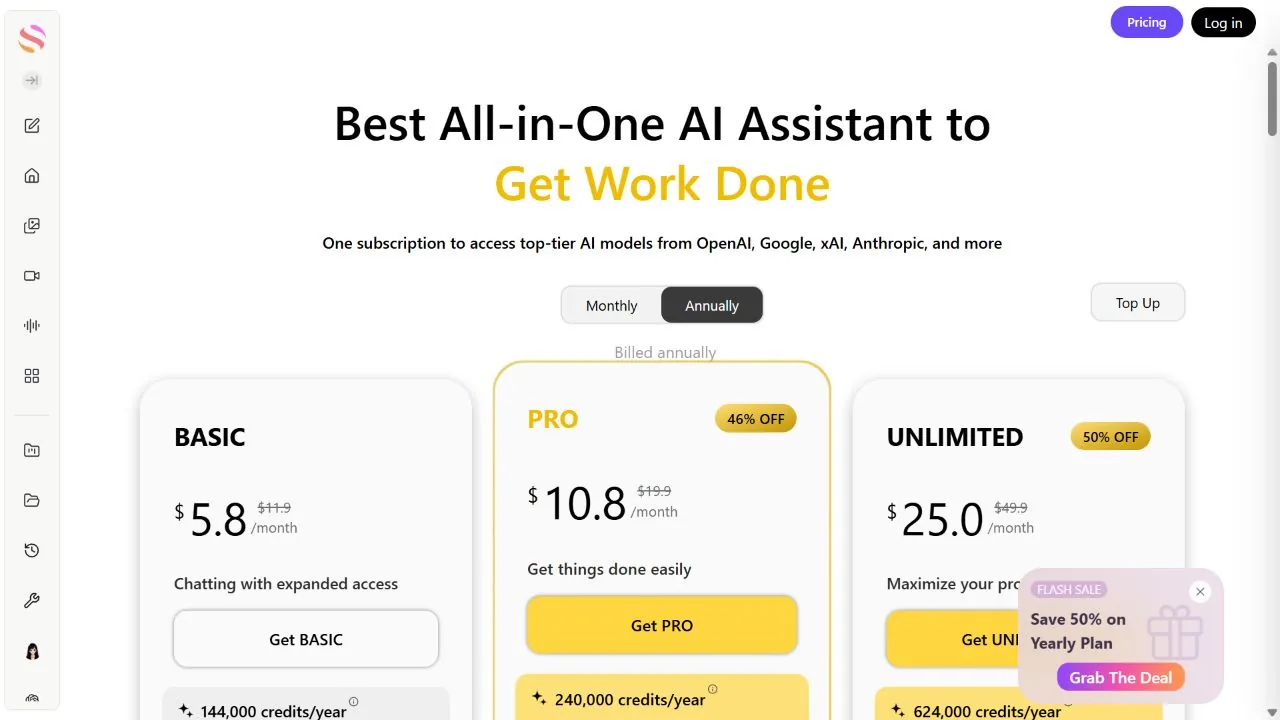
The current GlobalGPT pricing page lists Pro at $15 monthly, or $10.80 per month with annual billing: $129.60 upfront for a year. Twelve monthly payments total $180, so the annual option costs $50.40 less over that period. Prices checked September 30, 2026.
- Test a Short Clip First: Start at 720p with a short duration and turn audio off if the scene does not need it. Once the movement works, generate a final take at 1080p in GlobalGPT and review it again; a new generation can differ from the test. Use the video credit guide to keep provider credits separate from platform credits.
A Cinematic Prompt to Try
[Cinematic Action Prompt]
Camera: Slow tracking shot from behind.
Subject: A samurai walking through a neon Tokyo alley in the rain.
Action: Sparks flying from a broken sign, puddles rippling.
Vibe: Cyberpunk, 35mm film grain, 4k.
“4k” in this prompt describes the look; it does not change the selected output resolution. If a test goes wrong, use this guide to failed video generations before spending credits on another take.
What Are the Best Settings for TikTok, YouTube, and Professional Ad Formats?
Choosing the right technical settings ensures your video looks perfect on the specific platform where you plan to post it.
| Platform | Aspect Ratio | Resolution | Motion to Describe |
|---|---|---|---|
| TikTok / Reels | 9:16 (Vertical) | 1080p | High (Dynamic) |
| YouTube | 16:9 (Widescreen) | 1080p | Medium (Cinematic) |
| Instagram Post | 1:1 (Square) | 1080p | Low (Subtle) |
- Aspect Ratio Selection: Use 9:16 for mobile-first content to fill the whole screen. Use 16:9 for cinematic stories or presentations.
- Motion Direction: For action scenes like car chases, describe the speed and one camera move. For calm scenes like a person drinking coffee, ask for subtle motion and a steady camera. These Kling camera movement examples give you language to use in the prompt.
Watch: Kling 3.0 Beginner Guide
Watch the video for a visual introduction. Button labels and available models may differ from the current interface.
FAQs
Is Kling AI free to use in 2026?
Yes, Kling AI currently offers limited-time free credits for users to test the platform, while its app lists 4K generation as a subscriber feature. Use the allowance shown in your account rather than assuming 66 credits every day.
Can I make a long movie with Kling AI?
Yes. While single VIDEO 3.0 clips are 3–15 seconds, you can reuse Subject Binding references and edit clips together into longer storytelling sequences.
Does Kling AI support lip-sync?
Yes, VIDEO 3.0 supports native lip-sync by typing dialogue in the prompt box with native audio enabled. Uploading an audio sample for character voice binding is a separate workflow.
What is the best way to save credits on Kling AI?
Prepare a clear reference image before using Image-to-Video, then test a short clip at 720p. Use an image you already have, or create one in Midjourney. Turn native audio off when the scene does not need sound.
Can I use Kling AI on GlobalGPT?
Yes. GlobalGPT offers Kling 3.0 with start/end frames and 720p or 1080p output. Pro is $15 monthly or $129.60 per year ($10.80 per month with annual billing).
Conclusion
Mastering Kling AI in 2026 is no longer about being a tech expert, but about being a good director. By moving from simple text prompts to the advanced Image-to-Video workflow and utilizing features like start/end frames and Multi-Shot, you can create Hollywood-quality content on your phone. To maximize your results and save your budget, always plan your scenes with cheaper tools first and use an all-in-one platform to keep your creative process smooth and efficient.